OPEN-SOURCE FIRMWARE DEVELOPMENT
AURIX AI Agent.
From natural-language requirements to firmware running on Infineon AURIX™.
AURIX AI Agent is a firmware development assistant built on the Model Context Protocol (MCP), with a ready-to-use GitHub Copilot integration in VS Code.
ONE CONNECTED WORKFLOW
- 01 Describe
- 02 Generate
- 03 Build
- 04 Flash
RAPID PROTOTYPING
Build a prototype.
Refine it on hardware.
Describe the behavior you need. The agent uses Infineon AURIX documentation, iLLD drivers, and code examples to create or modify firmware, build it with GCC, and flash it to your board with AURIX Flasher.
Explore the tools- 01 Grounded in AURIX documentation
- Device-aware documentation search with physical PDF page citations, iLLD driver lookup, and public code examples to inform firmware changes.
- 02 Built on a free firmware toolchain
- The GCC compiler, AURIX Flasher, and the public iLLD driver library and code examples are free. Your chosen AI agent's access and usage terms apply separately.
- 03 Develop, adapt, and iterate
- Built-in skills cover peripheral development, migration between AURIX devices, and cross-vendor porting. Try a behavior on hardware, then refine it.
SEE IT ON HARDWARE
From an empty folder to a running board.
 ▶ Watch
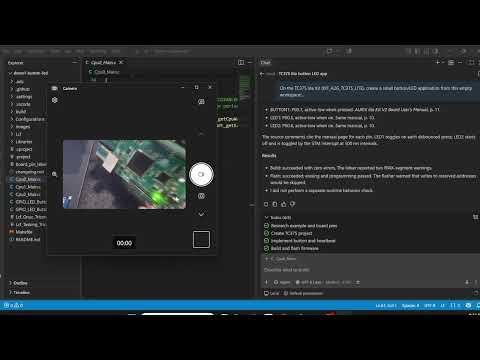
Button and LED from an empty folder
BUTTON1 toggles LED1 with debounce, and LED2 blinks from an STM timer interrupt. Every pin and active level is taken from the board manual and cited in the code.
 ▶ Watch
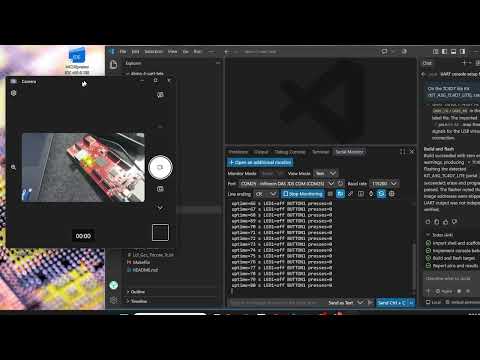
UART console over USB
A serial console with a periodic status line and LED commands, built from the official UART shell example.
 ▶ Watch
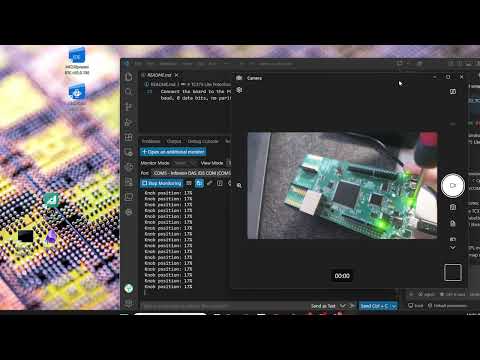
Two-mode control knob
The potentiometer sets LED1 brightness with GTM hardware PWM or the LED2 blink rate; BUTTON1 switches the mode, and full scale triggers an alarm.
 ▶ Watch
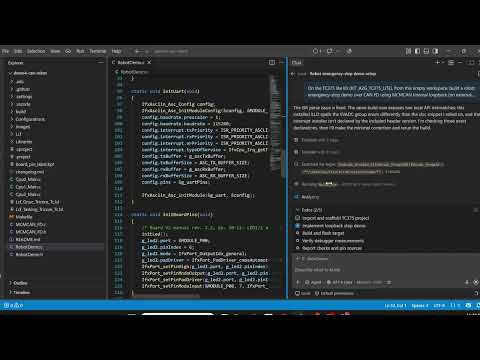
CAN FD emergency stop, verified with the debugger
The AI debugs the running board itself: it sets breakpoints, reads live variables and CAN error counters, and asks you to press BUTTON1 to confirm the E-STOP path.
GET STARTED WITH GITHUB COPILOT
Bring a board. Start a conversation.
- 01
Install the extension
Download the Windows VSIX. In VS Code, run Extensions: Install from VSIX... from the Command Palette and select it.
Download for Windows x64 - 02
Connect your toolchain
Open AURIX AI in the sidebar. Select your target device, set the IDE installation path, and click Generate Copilot Config.
- 03
Give Copilot a task
Open Copilot Chat in Agent mode. Under Configure Tools, enable aurix-mcp-server. For a connected TC375 board, try:
Create a TC375 blinky and flash it.Use your own device in the prompt. Review generated code and tool actions before programming hardware.
YOUR CHOICE OF AGENT
Not limited to Copilot.
The AURIX MCP server and skills are reusable beyond VS Code. Connect them to a compatible coding agent to bring the same create, build, and flash workflow to your preferred environment.
- 01
Connect the AURIX MCP server
Add the AURIX MCP server to an MCP-compatible coding agent. Provide the project folder and AURIX IDE installation path so the server's tools can find your project and local toolchain.
- 02
Add skills to your workspace
Copy our skills into the target workspace's supported skill directory. Include the project instructions they reference, and adapt client-specific tool names and instruction locations.
- 03
Use the same AURIX workflow
With workspace file access and MCP tools enabled, your agent can create or modify firmware, build with GCC, and flash with AURIX Flasher.
Client configuration and skill support vary; results depend on the agent and model. Chip-documentation search also needs the indexes bundled with the extension, which are not included in the standalone Python package.